Sony FX9 Manual: A Comprehensive Guide
Discover the Sony PXW-FX9’s full potential with detailed instructions, firmware updates (V4.02/XDCA-FX9 V2.20), and guides for wireless connections.
Explore setup, HDMI configuration, and XDCA-FX9 operation, alongside troubleshooting and accessory recommendations, all within the interactive PDF manual.
Download the operations manual and learn about V-Shoe compatibility, S-Cinetone, and slow-motion frame rates from Sony’s resources.
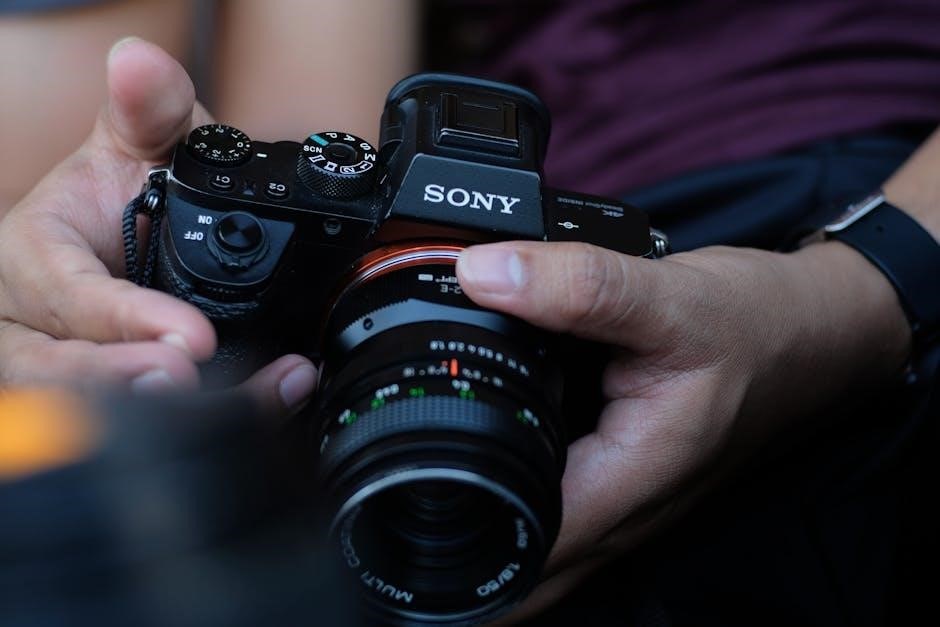
The Sony PXW-FX9 represents a significant leap forward in full-frame camera technology, designed for cinematographers and content creators demanding exceptional image quality and workflow flexibility. This comprehensive manual serves as your guide to unlocking the FX9’s vast capabilities, from initial setup to advanced operational techniques.
Built around a 6K full-frame sensor, the FX9 delivers stunning visuals with remarkable depth of field and low-light performance. Its modular design, featuring the optional XDCA-FX9 extension unit, allows for professional workflows including RAW recording and genlock/timecode synchronization. This manual details how to effectively utilize these features.
Whether you’re a seasoned professional or new to the FX9, this resource will provide clear, concise instructions on navigating the camera’s menu system, configuring settings for various shooting scenarios, and troubleshooting common issues. We’ll cover everything from basic operation to advanced techniques like S-Cinetone color science and slow-motion frame rate configuration. Stay updated with the latest firmware – PXW-FX9 V4.02 / XDCA-FX9 V2.20 – for optimal performance and compatibility.
This guide also highlights essential accessories and provides links to download the complete operations manual directly from Sony, ensuring you have all the information needed to maximize your creative potential with the FX9.
Understanding the FX9’s Key Features
The Sony FX9 boasts a compelling array of features designed for professional filmmaking. Central to its capabilities is the 6K full-frame sensor, delivering exceptional image quality, dynamic range, and shallow depth of field control. This sensor, combined with Sony’s processing engine, excels in low-light conditions, minimizing noise and maximizing detail.

Modular design is a cornerstone, allowing for customization with the XDCA-FX9 extension unit. This unit unlocks advanced functionalities like 10-bit RAW output, genlock, and timecode synchronization – crucial for multi-camera setups and post-production workflows. The V-Shoe compatibility further expands connectivity options for accessories.
S-Cinetone, a signature Sony color science, provides a cinematic look straight out of the camera, reducing the need for extensive color grading. The FX9 also supports various color profiles for maximum flexibility in post. Furthermore, its slow-motion capabilities, configurable frame rates, and robust audio controls empower filmmakers to capture stunning visuals and immersive sound.
Staying current with firmware updates, such as PXW-FX9 V4.02 / XDCA-FX9 V2.20, is vital for optimal performance and access to the latest features. Understanding these key features is the first step towards mastering the FX9’s potential.
Navigating the Menu System
The Sony FX9’s menu system, while comprehensive, requires familiarization for efficient operation. It’s structured logically into several key sections: General, Display, Audio, Image, Camera, and System. Each section houses numerous parameters for customizing the camera’s behavior.
Accessing the menu is done via the MENU button on the camera body. Utilize the multi-control dial and selector to navigate through the options and submenus; The LCD screen and viewfinder provide a clear visual representation of the current settings.
Understanding the hierarchical structure is crucial. Settings are often nested within multiple layers, so take time to explore each section thoroughly. The ‘User’ menu allows saving custom profiles for quick recall of frequently used configurations.
Pay attention to the icons accompanying each setting, as they provide visual cues to their function. The interactive PDF manual offers a detailed breakdown of each menu item. Regularly reviewing the manual alongside practical use will accelerate your mastery of the FX9’s menu system, unlocking its full potential.
Camera Setup and Initialization
Initial setup of the Sony FX9 involves several crucial steps to ensure optimal performance. Begin by securely attaching a compatible battery and inserting a formatted memory card – Sony recommends using high-speed cards for 4K recording. Power on the camera and follow the on-screen prompts to set the language, date, and time.
Next, configure the display settings to your preference, adjusting brightness, contrast, and color temperature. Calibrate the viewfinder and LCD screen for accurate monitoring. Ensure the camera’s system date and time are correctly set, as this impacts file naming and metadata.
Network settings can be configured during initialization, though this can be deferred. It’s vital to register your FX9 with Sony for warranty purposes and access to firmware updates. The interactive PDF manual provides a step-by-step guide to this process.
Finally, perform a system check to verify all components are functioning correctly. A properly initialized FX9 will deliver reliable performance and unlock its advanced features.
Setting Up Wireless Network Connection
Establishing a wireless network connection on your Sony FX9 enables remote control, file transfer, and firmware updates. Access the network settings via the menu, navigating to the ‘Network’ section. Select your desired network (Wi-Fi) from the available list.
Enter the network password accurately using the on-screen keyboard. The FX9 supports both 2.4GHz and 5GHz bands; 5GHz generally offers faster speeds but shorter range. Once connected, the camera will obtain an IP address automatically via DHCP, or you can configure a static IP address if required.
Verify the connection by checking the network status in the menu. A successful connection allows you to utilize Sony’s Content Browser Mobile app for remote control and file transfer. The PDF setup guide (5.7 MB) provides detailed illustrations and troubleshooting tips.
Ensure your network is secure and password-protected to prevent unauthorized access. Regularly check for firmware updates to maintain optimal network performance and security.
Firmware Updates: PXW-FX9 V4.02 / XDCA-FX9 V2.20
Maintaining up-to-date firmware is crucial for optimal Sony FX9 performance and stability. Version 4.02 for the PXW-FX9 and Version 2.20 for the XDCA-FX9 offer enhanced functionality and bug fixes. Before updating, ensure a stable power supply and sufficient battery charge.
Download the latest firmware files from the official Sony support website; Transfer the files to a USB drive formatted in FAT32. Insert the USB drive into the FX9’s USB port and navigate to the ‘System’ menu, then ‘Software Update.’
Follow the on-screen instructions carefully during the update process. Do not interrupt the update, as this could damage the camera. The update process may take several minutes. Once completed, the camera will restart automatically.
Verify the successful installation by checking the firmware version in the ‘System’ menu. These updates address known issues and improve overall system reliability. Please accept the terms and conditions before proceeding.
Attaching and Removing the XDCA-FX9
The XDCA-FX9 extends the Sony FX9’s capabilities with advanced features. To attach, align the V-Shoe on the XDCA-FX9 with the V-Mount on the FX9. Gently slide the XDCA-FX9 onto the camera until it clicks securely into place. Ensure a firm connection to prevent accidental detachment during operation.
Before attaching, inspect both the FX9’s V-Mount and the XDCA-FX9’s V-Shoe for any debris or damage. Clean if necessary. Proper alignment is vital for a stable connection and optimal performance. The XDCA-FX9 adds extra weight, so ensure balanced handling.
To remove, press the release button on the FX9’s V-Mount. Simultaneously, gently slide the XDCA-FX9 away from the camera. Avoid excessive force. If resistance is encountered, re-check the release button and alignment.
Always handle the XDCA-FX9 with care. If issues arise, promptly contact Sony for assistance. Continued use with a faulty connection could lead to damage.
Understanding V-Shoe Compatibility
The Sony FX9 utilizes the versatile V-Shoe interface, enabling seamless integration with a range of accessories, notably the XDCA-FX9. This standardized connection simplifies attachment and power distribution, eliminating the need for multiple cables.
V-Shoe compatibility ensures reliable data transfer and power supply between the camera and compatible accessories. It supports various functionalities, including remote control, audio input/output, and genlock synchronization. Always verify accessory compatibility before attachment.
Beyond the XDCA-FX9, numerous Sony and third-party accessories leverage the V-Shoe. These include external recorders, microphones, and wireless transmission systems. The V-Shoe provides a robust and secure connection, crucial for professional workflows.
Proper V-Shoe maintenance is essential. Regularly inspect the connector for debris or damage. Clean gently with a dry cloth if needed. Incorrectly seated accessories can lead to malfunctions, so ensure a firm click when attaching.
Operating Instructions and Safety Precautions
Prior to operating the Sony FX9, carefully review all included documentation and this manual. Familiarize yourself with the camera’s controls, menu structure, and safety guidelines. Incorrect operation can lead to damage or injury.
Always handle the camera with care, avoiding impacts and extreme temperatures. Do not expose the FX9 to direct sunlight for extended periods, as this can affect performance. Ensure adequate ventilation during operation to prevent overheating.
When attaching or removing accessories, power off the camera first. Never force connections. Be cautious when using external power sources, ensuring they meet the camera’s voltage requirements. Disconnect power during cleaning or maintenance.
If malfunctions occur, immediately cease operation and contact Sony support for assistance. Do not attempt self-repair, as this may void the warranty and pose safety risks. Follow all local regulations regarding electronic equipment usage;
Regularly check for firmware updates to maintain optimal performance and security.
Detailed Guide to Camera Settings
The Sony FX9 offers extensive customization through its menu system. Begin by understanding the core settings: Picture Profile, Gamma, Color Space, and Color Depth. S-Cinetone provides a cinematic look straight out of the camera, while other profiles offer flexibility for grading.
Explore the White Balance options, including Auto, Preset, and Custom modes, to achieve accurate color reproduction. Adjust ISO sensitivity carefully, balancing image brightness with noise levels. Shutter speed controls motion blur and exposure.
Dive into the audio settings, configuring input levels, monitoring, and recording formats. Utilize the built-in filters and limiter to ensure clean audio capture. The FX9’s focus settings allow for precise control, with options for manual, autofocus, and focus peaking.
Master the User Preset functionality to save and recall your preferred settings for different shooting scenarios. Regularly review and adjust settings based on lighting conditions and creative intent.
Image Settings: S-Cinetone and Color Profiles
The Sony FX9 excels in image versatility, offering a range of color profiles. S-Cinetone is a standout, delivering a cinematic look with enhanced contrast and subtle color adjustments, minimizing post-production grading. It’s ideal for immediate use and a natural aesthetic.
Beyond S-Cinetone, explore profiles like Cinegamma, which provides a wider dynamic range for greater flexibility in color correction. Choose between various Gamma curves to tailor the image to your specific needs. Color Space options include Rec.709 and S-Log3.
S-Log3 expands dynamic range, capturing more detail in highlights and shadows, but requires careful exposure and grading. Experiment with Color Depth settings (8-bit or 10-bit) to determine the optimal balance between file size and color fidelity.
Utilize the Picture Profile Assist function to visualize the impact of different settings on your footage. Remember to consistently apply a profile for a cohesive look throughout your project.
Slow-Motion Frame Rate Configuration
The Sony FX9 provides impressive slow-motion capabilities, achieved through variable frame rate settings. Access these options within the camera’s menu system, under the ‘Shoot’ settings. You can select from a range of frame rates, including 120fps and 180fps, for creating dramatic slow-motion effects.
However, higher frame rates necessitate careful consideration of shutter angle. A narrower shutter angle (e.g., 180 degrees) is recommended to maintain natural motion blur. Remember that recording at higher frame rates reduces recording time and increases file size.
The FX9 offers different readout methods for slow motion. Full-sensor readout provides the highest quality but limits resolution. Windowed readout allows for higher frame rates at full resolution, but crops the image.
Ensure sufficient lighting when shooting in slow motion, as higher frame rates require more light. Post-production software is crucial for interpreting and rendering the footage correctly. Experiment to find the optimal settings for your creative vision.
Audio Settings and Control

The Sony FX9 offers comprehensive audio control, crucial for professional filmmaking. Access audio settings through the camera’s menu, under the ‘Audio’ section. You’ll find options for input levels, audio monitoring, and recording formats.
The FX9 features multiple audio inputs, including XLR connectors with phantom power, accommodating a variety of microphones. Carefully adjust input levels to prevent clipping or excessive noise. Utilize the camera’s built-in audio meters for accurate monitoring.

Choose from various recording formats, including PCM and compressed audio codecs. Consider the compatibility of your editing software when selecting a format. The FX9 allows for independent control of each audio channel, enabling precise mixing and adjustments.
Utilize the headphone jack for real-time audio monitoring during recording. Pay attention to ambient noise and adjust settings accordingly. Proper audio setup is vital for achieving a polished and professional sound quality in your final production.
Using the Viewfinder and LCD Screen
The Sony FX9 provides both a high-resolution viewfinder (EVF) and a large LCD screen for monitoring and framing your shots. The EVF offers a clear and detailed view, especially beneficial in bright sunlight. Adjust the EVF’s diopter to match your vision for optimal clarity.
The LCD screen is fully articulating, allowing for flexible positioning and monitoring from various angles. Utilize the screen’s touchscreen functionality to quickly access menus and adjust settings. Both the EVF and LCD offer customizable display options, including focus peaking, zebra patterns, and safe area markers.
Access the ‘Display’ settings in the camera’s menu to tailor the information displayed on both screens. You can choose to show or hide various elements, such as audio levels, timecode, and recording status.
Familiarize yourself with the screen’s magnification feature for precise focus confirmation. Regularly check both the EVF and LCD to ensure accurate framing and exposure. Proper utilization of these monitoring tools is essential for capturing high-quality footage.
Media Card Management
The Sony FX9 supports various media card formats, primarily utilizing SxS and CFexpress Type A cards for professional workflows. Proper media card management is crucial for reliable recording and data security. Always format cards within the camera to ensure compatibility and optimal performance.
Access the ‘Media’ settings in the camera’s menu to view card capacity, remaining space, and file organization options. Regularly back up your footage to multiple locations to prevent data loss. Consider using a card reader for faster and more efficient file transfers to your computer.
The FX9 allows for dual media card recording, providing redundancy and extended recording times. Configure the camera to record simultaneously to both cards or utilize relay recording, automatically switching to the second card when the first is full.
Be mindful of card write speeds, especially when recording in high resolutions and frame rates. Use high-quality, fast cards from reputable brands to avoid dropped frames or recording errors. Regularly check the health of your media cards and replace them if necessary.
HDMI Output and Configuration

The Sony FX9 offers versatile HDMI output options for connecting to external monitors, recorders, and switchers. Access the ‘HDMI’ settings within the camera’s menu to customize the output signal according to your needs. You can select from various output formats, including 4K UHD, Full HD, and 2K DCI.
Configure the HDMI output to match the input requirements of your external device. Options include selecting the appropriate color space (e.g., Rec.709, S-Log3, S-Cinetone) and bit depth (8-bit, 10-bit). Ensure proper synchronization by choosing the correct HDMI timing mode.

The FX9 supports clean HDMI output, providing a signal without on-screen display elements like timecode or zebras. This is ideal for professional monitoring and recording workflows. You can also enable or disable HDMI output simultaneously with the camera’s internal recording.
Troubleshooting HDMI display issues is often related to compatibility or incorrect settings. Refer to the camera’s manual and the documentation of your external device for guidance. Ensure the HDMI cable is securely connected and of high quality.
XDCA-FX9 Remote Control Operation
The XDCA-FX9 attachment significantly expands the Sony FX9’s remote control capabilities, enabling advanced workflows for multi-camera setups and live production. Utilizing a dedicated remote controller, operators can manage numerous camera parameters from a distance, streamlining operations.
Remote control functionality includes adjusting iris, shutter speed, white balance, and focus. You can also initiate and stop recording, change media cards, and control camera movements via compatible remote systems. The XDCA-FX9 facilitates precise synchronization between multiple cameras.
Configuration of the remote control system is performed through the camera’s menu, assigning specific functions to remote control channels. Ensure proper communication between the XDCA-FX9 and the remote controller by verifying the connection settings and addressing.
For optimal performance, consult the XDCA-FX9’s dedicated manual for detailed instructions on remote control setup and operation. Proper understanding of the remote control protocol is crucial for seamless integration into professional broadcasting environments.
Troubleshooting Common Issues
Encountering problems with your Sony FX9? This section addresses frequent issues and provides solutions. A common concern involves AV and HDMI display problems, often stemming from incorrect cable connections or resolution mismatches. Verify cable integrity and ensure compatibility with your display device.
If the camera fails to power on, check the battery charge and power adapter connection. For recording errors, confirm sufficient media card space and proper card formatting. Network connectivity issues can usually be resolved by re-entering network credentials or restarting the camera.
Firmware related problems may necessitate a re-installation of the latest version (V4.02 for PXW-FX9, V2.20 for XDCA-FX9). If the XDCA-FX9 isn’t recognized, ensure it’s securely attached and properly configured in the camera menu.
For persistent issues, consult Sony’s support website or contact their customer service for specialized assistance. Detailed troubleshooting guides and PDF resources are available online to help resolve complex problems.
Understanding AV and HDMI Display Problems
Display issues with your Sony FX9 often center around AV and HDMI outputs. A frequent complaint, as noted in online forums, involves the image being confined to the upper left corner of the screen. This typically indicates a resolution or refresh rate incompatibility between the camera and the display.
Ensure your HDMI cable is securely connected and supports the required bandwidth for the selected resolution. Experiment with different HDMI ports on your display. Within the FX9’s menu, navigate to the output settings and verify the resolution matches your display’s native resolution.
Consider trying different HDMI output formats (e.g., 4:2:2, 4:4:4) to see if one resolves the issue. If using an AV connection, confirm the correct color space settings. Check for firmware updates (PXW-FX9 V4.02 / XDCA-FX9 V2.20) as these often include display compatibility improvements.
If problems persist, consult the Sony community forums for user-reported solutions or contact Sony support for further assistance. A faulty HDMI cable can also be the culprit, so testing with a known-good cable is recommended.
Recommended Accessories for the FX9
Enhance your Sony FX9’s capabilities with a selection of essential accessories. A robust external recorder, like the XDCA-FX9, is highly recommended for extended recording times and professional codecs. Invest in high-capacity, fast media cards to avoid dropped frames during high-resolution or slow-motion capture.
Consider a professional matte box to control light and utilize filters, alongside a follow focus system for precise manual focusing. A reliable external microphone and audio interface will significantly improve your sound quality. Don’t overlook a sturdy tripod and fluid head for stable shots.
For wireless monitoring and control, explore options like wireless video transmitters and remote control systems. A V-mount battery plate and batteries provide extended power for long shoots. Sony’s official accessories, alongside third-party options like Sigma lenses (300-600mm), can expand your creative possibilities.
Finally, a protective camera case and lens cleaning kit are crucial for safeguarding your investment. Regularly check for updated firmware (PXW-FX9 V4.02 / XDCA-FX9 V2.20) to ensure optimal accessory compatibility.
Interactive PDF Format Resources
Unlock a streamlined learning experience with the Sony FX9’s interactive PDF manual. This digital resource, available for download, offers a user-friendly interface for navigating complex camera settings and features. Benefit from embedded links, allowing quick access to specific sections and related information.
Explore detailed guides on HDMI output configuration, wireless network setup, and XDCA-FX9 operation. The PDF format facilitates easy searching for keywords, such as “S-Cinetone” or “slow-motion frame rates,” saving you valuable time. It also includes firmware update instructions (PXW-FX9 V4.02 / XDCA-FX9 V2.20);
Access comprehensive troubleshooting tips for common issues, including AV and HDMI display problems. The interactive elements enhance understanding, making it ideal for both beginners and experienced professionals. Written by Alister Chapman, the manual provides in-depth knowledge.
Download the PDF setup guide for wireless connections (5.7 MB) and operating instructions (364 KB) directly from Sony’s official website. This resource ensures you have the latest information at your fingertips.
Sony FX9 Operations Manual Download
Access the complete Sony PXW-FX9 Operations Manual online for free! Sony provides a readily available digital copy, ensuring you have immediate access to crucial information regarding your camera’s functionality. This comprehensive guide covers everything from initial setup and menu navigation to advanced shooting techniques and troubleshooting.
Download the manual to familiarize yourself with key features like S-Cinetone color profiles, slow-motion frame rate configurations, and detailed audio settings. The document also includes specific instructions for utilizing the XDCA-FX9 extension unit, including attachment, removal, and remote control operation.
Benefit from the latest updates, including information on firmware versions PXW-FX9 V4.02 and XDCA-FX9 V2.20. The manual addresses potential AV and HDMI display issues, offering solutions to common problems. It’s a vital resource for maximizing your FX9’s capabilities.
Find the downloadable PDF through Sony’s official support website, ensuring you receive an authentic and up-to-date version. This manual is your key to unlocking the full potential of your Sony PXW-FX9.
Lens Compatibility and Recommendations
The Sony FX9, featuring a full-frame sensor, boasts broad lens compatibility, primarily utilizing Sony E-mount lenses. However, with the appropriate adapter, you can seamlessly integrate lenses from other manufacturers, expanding your creative options significantly. Sony’s official documentation doesn’t explicitly detail specific recommendations beyond the E-mount standard.
Consider lenses optimized for full-frame sensors to fully leverage the FX9’s image quality. Popular choices include Sony’s G Master series, known for their exceptional sharpness and bokeh. Third-party options from brands like Sigma and Zeiss also deliver outstanding performance.
For cinematic shooting, prime lenses in the 24mm to 85mm range are ideal. Zoom lenses, such as a 24-70mm or 70-200mm, offer versatility. Recent discussions highlight the Sigma 300-600mm and Sony’s 400-800mm lenses as potential super-telephoto options.
Remember to factor in your shooting style and budget when selecting lenses. Adapters may introduce slight compatibility nuances, so thorough testing is recommended. Prioritize lenses that match the FX9’s high-quality imaging capabilities.