Dyson DC39 Instruction Manual: A Comprehensive Guide
This manual provides a step-by-step guide to operating your Dyson DC39, covering assembly, controls, maintenance, and troubleshooting for optimal cleaning performance;
Welcome to the world of powerful and efficient cleaning with your new Dyson DC39! This vacuum cleaner is engineered with innovative technology, including Root Cyclone technology, to provide exceptional suction and capture even microscopic dust particles. This instruction manual serves as your comprehensive guide to understanding and maximizing the capabilities of your DC39.
Before you begin, take a moment to familiarize yourself with the components and features detailed within. Proper understanding will ensure optimal performance and longevity of your machine. This guide will walk you through setup, operation, maintenance, and troubleshooting, empowering you to achieve a consistently clean home.
Unboxing and Component Identification
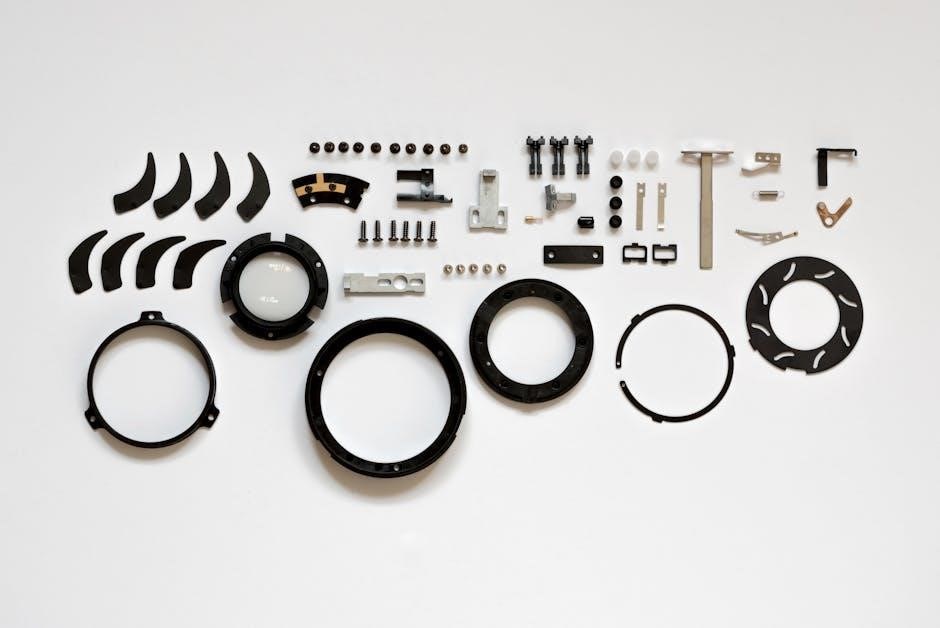
Carefully unpack your Dyson DC39 and verify all components are present. You should find the main body, wand, hose, floor tool, combination tool, and crevice tool. Also included are the instruction manual and potentially a pre-motor filter. Inspect each part for any shipping damage before proceeding.
Familiarize yourself with the Triggerhead parts diagram. The main body houses the cyclone assembly and dust bin. The wand connects to the body or hose for extended reach. The floor tool is designed for carpets and hard floors, while the attachments tackle specialized cleaning tasks. Retain the packaging for potential future transport or warranty claims.

Setting Up Your Dyson DC39
Proper setup ensures optimal performance. This section details assembling the main body, attaching the floor tool, and securely connecting the wand and hose for effective cleaning.
Assembling the Main Body
Begin by carefully connecting the cyclone assembly to the base of the machine, ensuring a firm and audible click to confirm secure attachment. Next, slide the motor head onto the cyclone assembly, again listening for the locking mechanism to engage.
Verify that all connections are snug and stable before proceeding. Improper assembly can lead to reduced suction and compromised cleaning performance. Refer to the diagrams provided within this manual for visual guidance if needed. A properly assembled main body is crucial for the Dyson DC39’s efficient operation.
Attaching the Floor Tool
To attach the floor tool, firmly push the wand connector into the designated port on the main body of the Dyson DC39 until it clicks securely into place. Ensure the tool is aligned correctly to prevent any wobbling during operation.
The floor tool is designed for versatile cleaning on both hard floors and carpets. For optimal performance on hard floors, disengage the brush bar using the controls located on the tool itself. Regularly inspect the tool for blockages to maintain consistent suction.
Connecting the Wand and Hose
Begin by securely attaching the hose to the main body of the Dyson DC39, ensuring a firm click to confirm a proper seal. Next, connect the wand to the other end of the hose, again listening for the distinct click indicating a secure connection.
This configuration extends your reach for cleaning higher areas and under furniture. Regularly check the hose and wand for any cracks or blockages that could reduce suction power. Proper connection is vital for efficient cleaning performance.

Understanding the Controls
Familiarize yourself with the power button, brush head controls, and suction settings to effectively manage your Dyson DC39’s cleaning capabilities and performance.
Power Button and Settings
The Dyson DC39’s power button is conveniently located for easy access during operation. A single press initiates the vacuum, while subsequent presses cycle through available suction settings. These settings allow you to tailor the cleaning power to different floor types and debris levels. Lower settings conserve energy for delicate surfaces, while maximum suction tackles stubborn dirt on carpets.
Observe the indicator lights to confirm the selected power level. The DC39 may feature settings for hard floors, carpets, and a combination mode for versatile cleaning. Understanding these controls ensures efficient and effective vacuuming throughout your home.
Brush Head Controls
The Dyson DC39’s brush head features controls designed for optimal cleaning performance on various surfaces. A key control is the brush bar on/off switch, allowing you to disable the rotating brush for delicate hard floors, preventing scratching and scattering debris. Some models include a height adjustment feature, enabling you to raise or lower the brush head to suit different carpet pile heights.
Proper brush head control maximizes suction and agitation. Regularly check the brush bar for tangled hair or fibers, as obstructions reduce effectiveness. Familiarize yourself with these controls to achieve a thorough clean on all floor types.
Adjusting Suction Power
The Dyson DC39 offers variable suction control, adapting to different cleaning tasks. Utilize the suction power slider or settings to reduce suction for delicate fabrics like curtains or lightweight rugs, preventing damage or sticking. Conversely, maximize suction for deep carpet cleaning or tackling stubborn debris on hard floors.
Adjusting suction optimizes cleaning efficiency and protects surfaces. Lower settings conserve energy, while higher settings deliver powerful cleaning. Experiment with different levels to find the ideal balance for each cleaning scenario, ensuring effective dirt removal without causing harm.
Using the Dyson DC39: Core Functions
Master essential cleaning with the DC39: vacuum hard floors, carpets, and reach high areas effectively using the wand and various tool attachments.
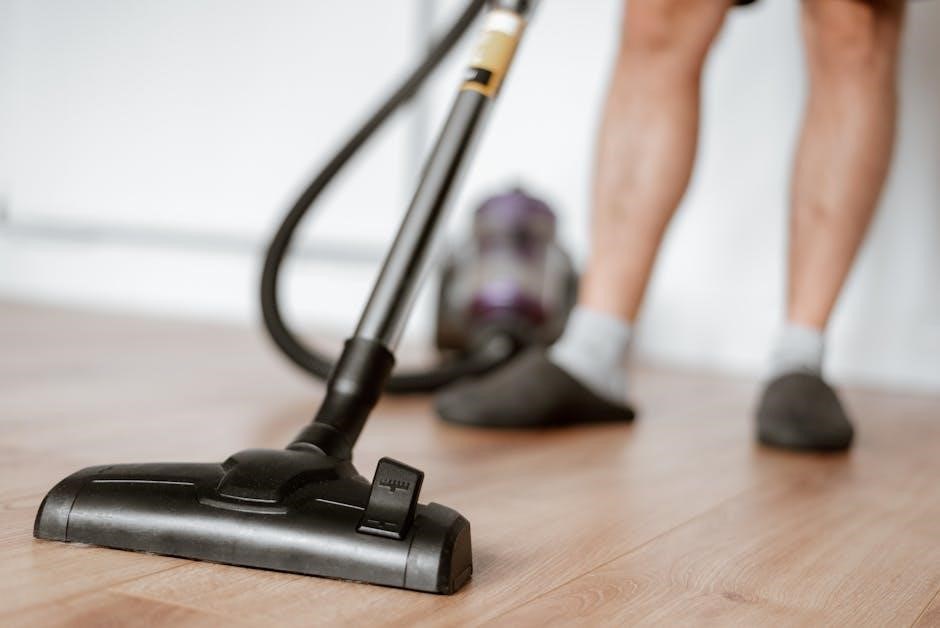
Vacuuming Hard Floors
For optimal hard floor cleaning with your Dyson DC39, utilize the appropriate floor tool attachment. Ensure the brush head is clean and free of obstructions for maximum suction. Gently glide the vacuum across the floor surface, overlapping each stroke slightly to avoid missed areas.
Avoid excessive force; the DC39’s suction power is designed to effectively lift dust and debris. For stubborn dirt, consider adjusting the suction power setting. Regularly empty the dust bin to maintain consistent performance. The DC39’s maneuverability allows for easy navigation around furniture and tight spaces, ensuring a thorough clean throughout your home.
Cleaning Carpets and Rugs
To effectively clean carpets and rugs with your Dyson DC39, select the appropriate floor tool designed for carpeted surfaces. Engage the brush bar to agitate and lift embedded dirt and debris. Adjust the suction power based on carpet pile height – higher for thicker carpets, lower for delicate rugs.
Vacuum slowly and methodically, overlapping each stroke to ensure comprehensive cleaning. Regularly check the brush bar for tangled hair or fibers. Empty the dust bin frequently, as carpets tend to generate more dust and debris. The DC39’s powerful suction and brush bar work together for a deep, thorough clean.
Reaching High Areas with the Extension Wand
The Dyson DC39’s extension wand allows you to effortlessly clean ceilings, curtains, and hard-to-reach areas. Connect the wand securely to the main body and select a suitable attachment, such as the combination tool for versatile cleaning. Maintain a stable grip and adjust the wand’s length for optimal reach.
Use lower suction settings for delicate surfaces like curtains. For ceilings, work systematically to avoid strain. Regularly check for blockages within the wand. The extension wand significantly expands the DC39’s cleaning capabilities, making overhead cleaning simple and efficient.

Attachments and Their Uses
The Dyson DC39 includes specialized tools – a crevice tool, combination tool, and tangle-free turbine head – designed for diverse cleaning tasks around your home.
Crevice Tool – Detailed Explanation
The Dyson DC39’s crevice tool is specifically engineered for precision cleaning in tight, hard-to-reach spaces. This slender attachment excels at targeting edges, corners, and narrow gaps where dust and debris accumulate. Effectively clean along baseboards, between cushions, and within car interiors.
Its focused suction power dislodges stubborn dirt, ensuring a thorough clean. The tool’s design prevents scratching delicate surfaces. Regularly inspect the crevice tool for blockages to maintain optimal performance. Combine with the wand for extended reach, maximizing cleaning convenience throughout your home.
Combination Tool – Versatile Cleaning
The Dyson DC39’s combination tool offers exceptional versatility for a wide range of cleaning tasks. Featuring a brush head that slides to reveal a crevice tool, it adapts to various surfaces and spaces. Use the brush for dusting furniture, curtains, and lampshades, gently lifting dust without causing damage.
Switch to the crevice tool for precise cleaning in tight spots, like corners and along edges. This dual-functionality minimizes the need for multiple attachments. Regularly check and clear the brush head of any tangled hair or fibers for peak performance.
Tangle-Free Turbine Head – Pet Hair Removal
The Dyson DC39’s tangle-free turbine head is specifically engineered for powerful pet hair removal from upholstery and carpets. Its rotating brush bar actively lifts and captures hair, minimizing tangles and maximizing suction. Unlike traditional brush heads, this design reduces the need for manual hair removal, saving you time and effort.
Regularly inspect the brush bar and remove any accumulated hair or debris to maintain optimal performance. This attachment is ideal for pet owners seeking a thorough and efficient cleaning solution.

Maintenance and Troubleshooting
Ensure peak performance by regularly emptying the dust bin, washing the filter, and checking for blockages within your Dyson DC39 vacuum cleaner.
Emptying the Dust Bin – Step-by-Step
To empty the dust bin on your Dyson DC39, first detach the bin from the main body by pressing the release button. Hold the bin over a trash receptacle and press the red bin release lever to empty the collected debris. Ensure all dust and dirt are removed. Wipe the bin clean with a dry cloth if necessary.
Reattach the bin firmly to the machine, ensuring it clicks securely into place. Regularly emptying the bin – ideally after each use – maintains optimal suction power and cleaning efficiency. A full bin significantly reduces performance.
Washing the Filter – Importance and Procedure
Maintaining a clean filter is crucial for your Dyson DC39’s performance. A dirty filter restricts airflow, reducing suction power. Wash the filter regularly – Dyson recommends every three months, or more often if used frequently. Remove the filter by twisting it counterclockwise.
Rinse the filter under cold water until the water runs clear. Do not use detergents. Allow the filter to air dry completely for at least 24 hours before reinstalling. A damp filter can damage the machine. Reinstall by twisting clockwise.
Checking for Blockages – Common Locations
Reduced suction often indicates a blockage. Begin by turning off and unplugging your Dyson DC39. First, inspect the wand for obstructions – a coat hanger can help dislodge debris. Next, check the hose; detach it and look through it for blockages.
The floor tool and brush head are also frequent culprits. Remove and clear any tangled hair, string, or large particles. Finally, examine the cyclone assembly for clogs. Regular checks prevent performance issues and ensure optimal cleaning.
Advanced Features and Tips
Unlock the DC39’s full potential with Root Cyclone technology and Ball technology for superior maneuverability and consistent suction across all floor types.
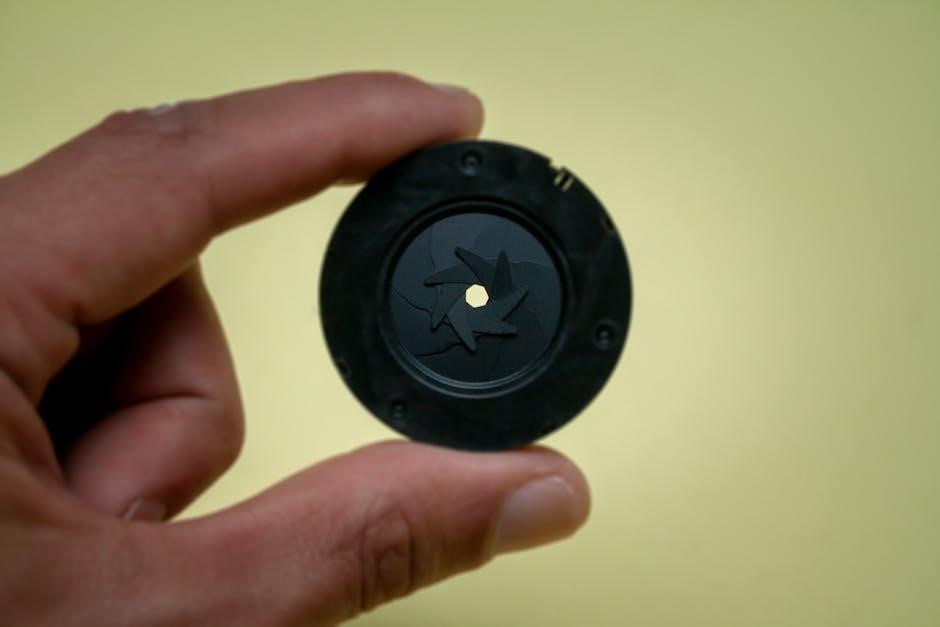
Root Cyclone Technology – How it Works
Dyson’s Root Cyclone technology is a revolutionary system designed to prevent suction loss as you clean. Unlike traditional vacuums where dust accumulates and clogs filters, the DC39 utilizes powerful centrifugal forces.
Air and dust are spun at incredibly high speeds, forcing microscopic particles outwards towards the dust bin. This creates a constant, strong airflow, ensuring consistent cleaning power throughout your entire home.
The radial cyclones work in parallel, increasing efficiency and separating even fine dust effectively, eliminating the need for frequent filter cleaning and maintaining optimal performance.
Ball Technology – Maneuverability Explained
The Dyson DC39 incorporates Ball technology, a pivotal design element enhancing maneuverability and steering. Unlike traditional wheeled vacuums, the central ball allows the machine to pivot smoothly and effortlessly around furniture and obstacles.
This design reduces the strain on your wrists and makes navigating tight spaces incredibly easy. The ball’s low center of gravity also contributes to the vacuum’s stability, preventing it from tipping over during operation.
Enjoy seamless transitions between hard floors and carpets with the responsive steering provided by this innovative technology.
Optimizing Suction for Different Surfaces
The Dyson DC39’s suction power is adaptable for various floor types. For hard floors, utilize the appropriate tool and consider adjusting the suction setting to prevent scattering debris.
On carpets and rugs, engage the brush bar to agitate and lift embedded dirt. For thicker carpets, maximize suction for deeper cleaning.
Regularly check for blockages in the wand and hose, as these significantly reduce suction.
Understanding your floor type and adjusting accordingly ensures optimal cleaning performance and prolongs the life of your Dyson DC39;

Safety Precautions
Always disconnect the Dyson DC39 before maintenance. Avoid using on wet surfaces and never insert objects into openings. Ensure electrical safety at all times.
General Safety Guidelines
Before using your Dyson DC39, carefully read all instructions and warnings. This appliance is intended for household use only. Do not use it for commercial or outdoor purposes. Never operate the vacuum with a damaged cord or plug. If the cord is damaged, it must be replaced by Dyson or a qualified technician.
Keep hair, loose clothing, fingers, and all body parts away from moving parts. Do not use without filters in place. Never point the hose or wand at people or pets. Always turn off and unplug the vacuum before changing filters or emptying the dust bin.
Avoiding Damage to Surfaces
To prevent scratching delicate surfaces, always test the vacuum on an inconspicuous area first. Avoid using the Dyson DC39 on polished wood floors with the brush bar rotating; utilize the appropriate floor tool setting. Be cautious when vacuuming around furniture legs and tight corners to prevent bumping or marking.
Do not attempt to vacuum sharp objects, hot ashes, or flammable liquids. Refrain from using abrasive cleaning agents on any part of the machine. Regularly check the brush bar for tangled hair or debris that could cause scratching.
Electrical Safety Information
Always ensure the power cord is not damaged before use. Do not operate the Dyson DC39 with a damaged cord or plug, and avoid using extension cords. Unplug the vacuum from the power outlet before performing any maintenance or troubleshooting.
Never immerse the machine, cord, or plug in water or other liquids. Use only a grounded electrical outlet. Do not use outdoors or in wet areas. If the power cord is damaged, it must be replaced by Dyson or a qualified technician to avoid hazards.

Warranty Information
The Dyson DC39 comes with a limited warranty covering defects in materials and workmanship. Register your product online for complete details and coverage.
Dyson DC39 Warranty Details
Dyson provides a two-year warranty on the DC39 vacuum cleaner against defects in materials and workmanship from the date of purchase. This warranty covers parts and labor necessary to repair or replace a defective unit. It does not cover damage caused by misuse, accidental damage, or normal wear and tear.
To make a warranty claim, contact Dyson customer support with proof of purchase. Unauthorized repairs or modifications void the warranty. The warranty is non-transferable and applies only to the original purchaser.
Registering Your Product
Registering your Dyson DC39 vacuum cleaner online is highly recommended. Registration allows Dyson to provide you with important product updates, exclusive offers, and faster service should you need assistance. It also helps Dyson track product information for quality control purposes.
You can register your DC39 on the official Dyson website using your model number and purchase date. Keep your proof of purchase handy during the registration process. Registration is quick, easy, and ensures you receive the full benefits of your Dyson ownership.

Frequently Asked Questions (FAQ)
Find solutions to common issues like suction loss and brush bar problems within this section, ensuring your Dyson DC39 operates at peak efficiency.
Common Issues and Solutions
Reduced suction is often caused by a full dust bin or blocked airways. Regularly empty the bin and check the wand, hose, and brush head for obstructions. If suction remains weak, inspect the filter; a dirty filter restricts airflow. For brush bar issues, ensure it’s free from tangled hair and debris. A jammed brush bar prevents effective cleaning. If problems persist, consult the troubleshooting section or Dyson’s support resources for further assistance. Remember to always unplug the machine before inspecting or cleaning any components to ensure safety.
Troubleshooting Suction Loss
If your Dyson DC39 experiences suction loss, first check the dust bin – a full bin drastically reduces performance. Next, inspect the hose, wand, and floor tool for blockages; remove any obstructions found. A clogged filter is another common culprit, so wash it according to the maintenance instructions. Ensure all connections are secure and airtight. If the issue persists, examine the brush bar for tangled hair or debris. Finally, verify that the machine isn’t set to a lower suction power setting.
Addressing Brush Bar Problems
If the brush bar on your Dyson DC39 isn’t spinning, first unplug the machine for safety. Check for tangled hair, threads, or debris wrapped around the brush bar – carefully remove these obstructions. Ensure the brush bar is correctly seated and hasn’t become dislodged. Inspect the motor for any signs of damage or burning smells. If the motor seems faulty, professional repair may be necessary. Regularly cleaning the brush bar prevents future issues and maintains optimal cleaning performance.