4×8 Hardie Panels are durable, low-maintenance siding options․ Made from fiber cement, they resist fire and harsh weather․ Correct installation is crucial for longevity․
Overview of Hardie Panels and Their Benefits
Hardie Panels are made from durable fiber cement, offering resistance to fire, moisture, and pests․ They provide a low-maintenance, long-lasting exterior solution․ Available in various textures and styles, they enhance curb appeal while withstanding harsh weather conditions․ Their fire-resistant properties make them a safe choice for homeowners․ Proper installation ensures optimal performance and aesthetic appeal, making them a popular option for modern siding needs․
Importance of Proper Installation Techniques
Proper installation of 4×8 Hardie Panels is critical to ensure durability and weather resistance․ Improper techniques can lead to gaps, water infiltration, and reduced lifespan․ Following manufacturer guidelines, such as correct fastening patterns and spacing, prevents structural issues․ Proper sealing of joints and edges is essential for maintaining the panels’ integrity․ Additionally, using the right tools and materials ensures a secure and long-lasting installation, protecting the panels from environmental damage and enhancing overall performance․ This attention to detail guarantees a professional finish and extends the product’s warranty benefits․

Tools and Materials Required
Essential tools include drills, circular saws, and utility knives․ Materials needed are stainless steel fasteners, weatherproof sealants, and protective gear for safe handling of heavy panels․
Essential Tools for Handling 4×8 Hardie Panels
Key tools include a vacuum lifter or panel lifters for safe handling of heavy panels․ A circular saw or utility knife is needed for cutting․ Drills and impact drivers are essential for fastening․ A tape measure and level ensure accurate alignment․ Safety gear like gloves and dust masks are crucial․ Additionally, a stud finder helps locate framing for secure fastening․ Proper tools ensure efficient and damage-free installation, preventing injuries and material waste․
Recommended Fasteners and Sealants
For 4×8 Hardie Panels, use stainless steel or galvanized fasteners to prevent rust․ Screws should be 1-1/2″ to 2″ long, spaced 12-16 inches apart․ Seal gaps with a high-quality exterior caulk, ensuring weatherproofing․ Flashing at critical areas like windows and doors is essential․ Proper fastening and sealing prevent water infiltration and structural damage, ensuring durability and maintaining the panels’ integrity over time while adhering to manufacturer guidelines․
Pre-Installation Preparation
Ensure the site is clear and safe․ Inspect panels for damage and store them properly․ Follow safety guidelines and review technical documentation before starting the installation process․
Site Preparation and Safety Measures
Clear the site of debris and obstacles to ensure safe working conditions․ Wear protective gear, including gloves, safety glasses, and a dust mask․ Proper ventilation is essential when cutting panels outdoors to avoid inhaling dust․ Ensure all tools and materials are within easy reach to minimize accidents․ Secure panels firmly to prevent shifting during installation․ Follow James Hardie’s safety guidelines for cutting and handling to maintain a safe working environment throughout the project․
Inspecting and Storing Hardie Panels
Inspect 4×8 Hardie Panels for damage or defects before installation․ Store panels on a flat, dry surface, away from direct sunlight and moisture․ Secure them with straps or weights to prevent shifting․ Avoid stacking panels directly on the ground to maintain stability․ Protect panels from environmental exposure by covering them with waterproof materials․ Ensure proper ventilation to prevent moisture buildup․ Follow James Hardie’s storage guidelines to preserve panel quality and ensure optimal installation results․
Understanding Installation Guidelines
Adhering to James Hardie’s installation guidelines ensures compliance with manufacturer instructions and building codes․ Proper techniques guarantee structural integrity and weather resistance, essential for lasting performance and safety․
Specific Considerations for 4×8 Panel Sizing
Proper sizing ensures a precise fit for 4×8 Hardie Panels, minimizing cuts and waste․ Measure walls accurately, accounting for expansion gaps and alignment․ For vertical installations, panels should span from foundation to soffit․ Horizontal applications require attention to joint placement and spacing․ Use recommended fasteners to secure panels firmly, avoiding over-tightening․ Ensure panels are level and plumb to prevent warping․ Follow James Hardie’s sizing guidelines for optimal fit and durability․ Proper sizing is critical for weatherproofing and structural integrity․
Fastening 4×8 Hardie Panels
Use stainless steel fasteners for durability and weather resistance․ Ensure proper spacing and alignment to prevent warping․ Tighten firmly but avoid over-tightening to maintain integrity․
Proper Fastener Spacing and Patterns
Proper fastener spacing ensures structural integrity and prevents warping․ Use 12-inch spacing on center vertically and horizontally․ Align fasteners with studs for secure installation․ Avoid over-tightening, as it may damage panels․ Stainless steel screws are recommended for durability․ Leave a 1/4-inch gap at the bottom for expansion․ Ensure even distribution of fasteners to maintain panel stability and weather resistance․ Follow manufacturer guidelines for optimal results and longevity of the siding․
Best Practices for Securing Heavy Panels
To ensure stability, use lifting tools or rigs for handling heavy 4×8 Hardie panels․ Align panels straight and level before fastening․ Start installation from the bottom, working upward․ Use stainless steel screws for durability and resistance․ Apply a rainscreen method for improved weather protection․ Leave 1/4-inch gaps for thermal expansion․ Secure panels firmly but avoid over-tightening to prevent damage․ Proper alignment ensures a professional finish and prevents warping․
Sealing Gaps and Joints for Weatherproofing
Sealing gaps and joints is critical for maintaining weather resistance․ Apply high-quality sealants to all panel edges and intersections․ Ensure proper adhesion by cleaning surfaces before sealing․ Use weatherproof tape for additional protection along seams․ Inspect all joints post-installation to confirm they are tightly sealed․ Regularly check and reseal gaps to prevent water infiltration․ Proper sealing enhances durability and prevents structural damage from moisture exposure․
Installing Flashings at Critical Areas
Flashings are essential at vulnerable points like windows, doors, and rooflines․ Use durable materials such as stainless steel or PVC to ensure long-lasting protection․ Install flashings behind panels at joints and intersections to prevent water infiltration․ Ensure flashings extend beyond panel edges for comprehensive coverage․ Seal all flashing edges securely to maintain weather tightness․ Follow manufacturer guidelines for specific flashing requirements to guarantee optimal performance and prevent costly repairs․ Proper flashing installation is vital for protecting your structure from moisture damage․
Common Mistakes to Avoid
Avoiding common errors ensures a durable installation․ Incorrect fastening, poor alignment, and improper sealing are frequent issues․ Always follow guidelines to prevent costly repairs and ensure structural integrity․
Errors in Fastening and Alignment
Improper fastening and alignment are common mistakes․ Over-tightening can lead to cracking, while under-tightening compromises structural integrity․ Misaligned panels cause uneven surfaces and expose gaps, allowing water damage․ Proper spacing and alignment ensure a seamless, weather-tight installation․ Always follow James Hardie’s guidelines to prevent costly repairs and maintain the panels’ durability and aesthetic appeal․ Correcting these errors early is essential for long-term performance and visual satisfaction․
Neglecting Proper Sealing Techniques
Neglecting proper sealing techniques can lead to water infiltration and structural damage․ Gaps between panels and at joints must be sealed with appropriate weatherproofing materials․ Improper sealing compromises the integrity of the installation, allowing moisture to penetrate and cause rot or mold․ Always use recommended sealants and follow James Hardie’s guidelines to ensure a watertight seal․ Proper sealing prevents long-term damage and maintains the durability of the 4×8 Hardie Panels, ensuring a safe and visually appealing exterior․

Maintenance and Care
Regularly inspect 4×8 Hardie Panels for damage or wear․ Clean dirt and debris with mild detergents to maintain appearance․ Address repairs promptly to prevent issues․
Regular Inspection and Cleaning
Regular inspection ensures durability and aesthetics of 4×8 Hardie Panels․ Check for cracks, gaps, or water damage․ Clean panels with mild detergents and water to remove dirt․ Avoid harsh chemicals or abrasive materials that may damage the finish․ Use a soft-bristle brush for gentle scrubbing; Rinse thoroughly to prevent residue buildup․ Inspect joints and sealants for wear․ Address minor issues promptly to prevent larger problems․ Cleaning every 6-12 months maintains appearance and functionality․ Follow manufacturer guidelines for best results․
Repairing Damaged Panels
Repairing damaged 4×8 Hardie Panels requires careful assessment and prompt action․ Start by cleaning the damaged area to ensure proper adhesion․ For minor cracks, use a fiber cement patching compound and sand smooth․ Replace severely damaged panels to maintain structural integrity․ Apply a weatherproof sealant to gaps or joints․ Follow James Hardie’s repair guidelines to ensure longevity․ Addressing damage early prevents further deterioration and maintains the panels’ appearance and functionality․ Always use recommended materials for optimal results․
Cost Considerations
4×8 Hardie Panels offer long-term savings despite higher upfront costs․ Their durability and low maintenance reduce future expenses, making them a cost-effective choice for homeowners․
Estimating Material and Labor Costs
Estimating costs for 4×8 Hardie Panel installation involves calculating materials and labor․ Material costs include panels, fasteners, and sealants․ Labor costs vary by location and installer expertise․ Factors like site preparation, tools, and potential repairs also impact the budget․ Properly estimating ensures project feasibility and avoids cost overruns․ Always consult James Hardie’s technical guides for specific material requirements and local pricing to create an accurate budget plan․
Long-Term Durability and Value
4×8 Hardie Panels offer exceptional durability, resisting pests, rot, and weather damage․ Their long lifespan reduces maintenance costs and enhances resale value․ Proper installation and regular care ensure they maintain their appearance and structural integrity․ As a premium siding choice, they provide lasting value, making them a worthwhile investment for homeowners seeking a resilient and attractive exterior solution․

Safety Practices
Handling 4×8 Hardie Panels requires protective gear and safe lifting techniques․ Always cut panels outdoors, wearing a dust mask, and ensure proper ventilation to avoid inhaling dust․
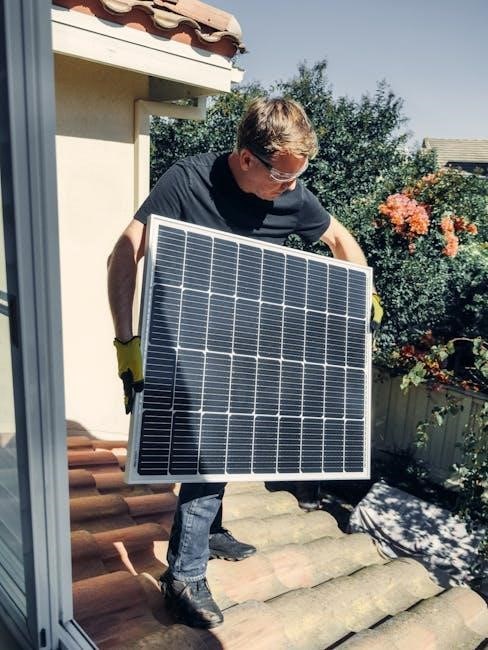
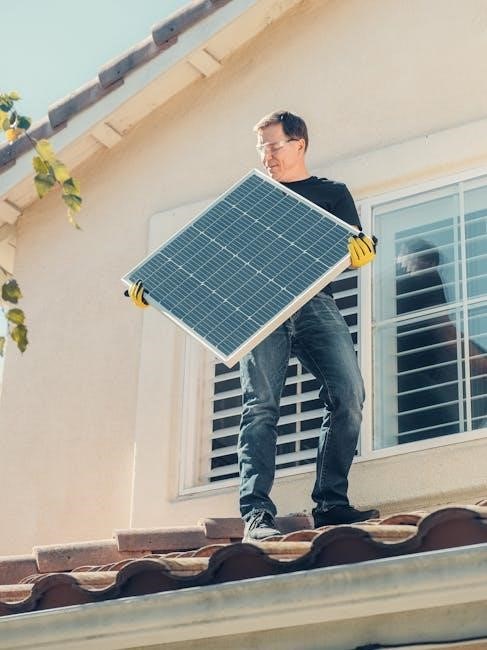
Handling Heavy Panels Safely
Handling 4×8 Hardie Panels requires careful planning and teamwork due to their weight․ Always use proper lifting techniques to avoid injury․ Consider using panel lifts or suction grips to manage heavy sheets․ Ensure panels are securely fastened during transport and installation․ Use mechanical aids when possible to reduce manual strain․ Proper safety gear, including gloves and eyewear, is essential․ Follow James Hardie’s guidelines for safe handling practices to minimize risks and ensure a secure installation process․
Protective Gear and Cutting Guidelines
Wear protective gear, including respirators, gloves, and goggles, when cutting 4×8 Hardie Panels to avoid inhaling dust and prevent eye injury․ Use diamond-tipped blades for clean cuts․ Avoid cutting indoors to minimize dust exposure․ Position cutting stations outdoors, ensuring wind direction blows dust away․ Follow James Hardie’s guidelines for safe cutting practices to maintain product integrity and personal safety․ Proper safety measures ensure a hazard-free installation process and comply with manufacturer recommendations for handling fiber cement materials effectively․

Advanced Installation Techniques
Advanced techniques include rainscreen installations for improved moisture management and incorporating trim accessories for enhanced durability and aesthetic appeal․ These methods ensure superior performance and visual consistency․
Using Rainscreen Installation Methods
Rainscreen installation involves creating an air gap between the Hardie panels and the water-resistive barrier․ This method enhances moisture management, allowing drainage and drying behind the siding․ It prevents water intrusion and reduces the risk of damage from rot or mold․ Proper sealing of gaps and joints is critical to maintain weatherproofing․ This technique is particularly effective in regions with high rainfall or humidity, ensuring long-term durability and performance of the 4×8 Hardie panels․
Incorporating Trim and Accessories
Trim and accessories enhance the appearance and functionality of 4×8 Hardie panels․ They provide smooth transitions between panels and other construction elements․ Proper installation ensures a seamless look and protects against weather damage․ Accessories like corner trim and J-channels are essential for finishing edges and corners․ They also cover gaps, maintaining structural integrity and visual appeal․ Always follow manufacturer guidelines for trim placement and fastening to achieve professional results and a polished finish․
Resources and Documentation
Access James Hardie’s official technical bulletins and manuals for detailed installation guides․ These resources cover clearance requirements and best practices, ensuring compliance with building codes and standards․ Visit their website for the latest documentation and installation videos to support your project successfully․
James Hardie Technical Bulletins and Manuals
James Hardie provides detailed technical bulletins and manuals to guide proper installation of 4×8 Hardie Panels․ These resources include specifications for clearance, fastening, and sealing, ensuring compliance with building codes․ Tech Bulletin 19, for example, addresses installation over non-nailable substrates like gypsum or foam․ Visit their official website for the latest documentation, installation videos, and compliance guidelines to ensure your project meets all requirements and standards effectively․
Online Tutorials and Installation Videos
James Hardie offers comprehensive online resources, including tutorials and installation videos, to assist with 4×8 Hardie Panel projects․ These guides provide step-by-step instructions for proper installation techniques, ensuring a professional finish․ Videos cover topics like fastening, sealing, and rainscreen methods, while tutorials emphasize safety and efficiency․ Accessible on their official website, these resources are designed to help contractors and DIYers achieve optimal results․ They are free and readily available to support successful installations․
Successful installation of 4×8 Hardie Panels requires attention to detail and adherence to guidelines․ Proper preparation and compliance ensure durability and professional results․
Proper installation of 4×8 Hardie Panels involves precise alignment, correct fastening techniques, and weatherproofing․ Maintain fastener spacing, ensure gaps are sealed, and use compatible materials․ Adherence to manufacturer guidelines is essential for structural integrity and aesthetic appeal․ Regular inspections and maintenance ensure long-term durability․ Always follow safety protocols when handling heavy panels and cutting materials to avoid injuries and ensure a professional finish․ Compliance with local building codes is mandatory․
Final Tips for a Successful Project
Begin with thorough site preparation and safety measures․ Use recommended tools and fasteners to ensure secure installation; Properly seal gaps and install flashings at critical areas for weatherproofing․ Regularly inspect panels and address damage promptly․ Follow James Hardie’s technical guidelines and safety practices․ Plan ahead to avoid common mistakes, and consider advanced techniques like rainscreen installation for enhanced performance․ Proper planning and execution will yield a durable, visually appealing exterior․ Always review technical documentation for specific requirements․